Home Office + Edit Suite
My dream home office + edit suite is finally complete! I’ve been dreaming up this space over the last three years ever since we moved into this house, and after a long wait on Ikea cabinets to come back in stock, we finally had the chance to put it all together. My dad and Brad did an incredible job, as always, making my vision come to life. I can’t wait to work in here! 🤩


I knew as soon as we moved into this house that we didn’t have enough storage. With all of our camera gear, my paper crafting supplies, and with me starting to work from home full-time, we had a lot of stuff to get into our office and no closet or cabinets to put it all. So I started dreaming about what we could use to contain all of our gear while still having a pretty office to work out of. We landed on the PAX system from Ikea. It has tons of interior organization options and is totally customizable. I was also inspired by Pinterest how to make the cabinets look built in and permanent in the space.


The design was pretty fun to lay out in Ikea’s planning tool program. Kind of like a real life Sims game! I decided to do the thinner 13” cabinets along the entire lefthand wall and then two of the deeper 22” cabinets on the back wall with space for my desk to go in between. Since Ikea didn’t have a corner unit option that worked with both depths, I just planned to have a little dead space in the corner where the cabinets meet.
Our ceiling is 108” tall, and I really wanted to take advantage of the height of the room, so I went with the 92” cabinet height and planned to build some cubbies to go above the cabinets all the way to the ceiling for even more storage. You can never have enough!

After we put together all of the cabinets, we had to work out how to mount them permanently to the wall. We wanted them to be super sturdy and built-in, so we cut out strips of the drywall across the top and bottom of where the cabinets would go and replaced with wood so we had something sturdy to drill into. That would ensure the cabinets wouldn’t budge even a little bit.


At this stage we also worked out the electrical. The cabinets were going to cover up about three wall outlets and I still wanted to have access to those. I wanted our printer to live inside of one cabinet, and another would hold our camera battery charging station. So we moved the outlets up to the level of the first interior shelf, and we cut holes in the back of the cabinets so that the outlets could come through. We also put an outlet above one of the cabinets, so that our internet modem and router could go in that cubby. And to make it easier to reset the router, we put in a light switch inside the cabinet that controls the power of that outlet we put up top—so anytime we need to shut our internet off we can just hit the light switch in the cabinet. Unnecessary? Absolutely. But it’s a little luxury Brad was pretty excited about.


Next up was building the cubbies. We had originally planned to make them out of wood and paint them, but my dad had a great idea to build them out of the Ikea shelves that go inside the cabinets. That way they would be the same size, material, and color—and we wouldn’t have to paint! We decided to use a faux shiplap board as the backing since I planned on putting shiplap behind my desk, so it would match. My dad built the cubbies out separately, and then we added them to the top of the Ikea cabinets and secured it before attaching the entire unit to the wall. We went one by one until all the units were secured to each other and to the wall. We secured the cabinets to the wall using Ikea’s cams and cam locks, and then fastened the cabinets to each other with the Ikea furniture join connectors.

Then we worked on the desk space. This was the most complicated part, since I had big plans for my edit workstation. My goal was to have the fewest amount of cables showing and to have as clear of a desktop as possible. So I planned to wall-mount my computer monitor and speakers, as well as a 55” TV above my monitor. I also planned to put my computer and hard drives in the left desk cabinet so it would all be hidden from view.
We had a lot of electrical to work out here, as well as how to run all the cables I needed to my computer cabinet, so we decided to cut out the drywall to make it easier to do everything behind the wall. I planned on finishing the wall with shiplap here anyway, so I wasn’t worried about the drywall.


We ended up putting in three new wall outlets. One in the middle of the wall for my computer monitor and speakers to plug into, and then two for inside my computer cabinet—one on each interior shelf.
We also put in three PVC pipes to run all the cables. The first comes from the left top cubby that will have our internet router and goes through the attic and down to the computer cabinet. This is so I can get an ethernet cable to my computer. The second PVC pipe is the shortest one going from where my speakers and monitor will be down to the computer cabinet. And the third is in the middle of the wall behind where the TV will go. It goes all the way up through the attic and comes out the same cubby our internet router is in, as well. We planned to put in a Samsung Frame TV, and the One Connect box will go in the cubby up top, so that’s how we planned to run the cable through the wall.

Once everything behind the wall was in place, we closed up the wall with plywood instead of drywall. The plywood gave us some extra support for all the heavy equipment we’d be mounting on the wall.


Next we added my desk cabinets in. I used the Ikea Sektion 15x24” base cabinets. Since they were a little bit deeper than the PAX cabinets next to them, we ended up cutting them down just a bit so they would be flush. That ensured that the doors would have no problem swinging open.
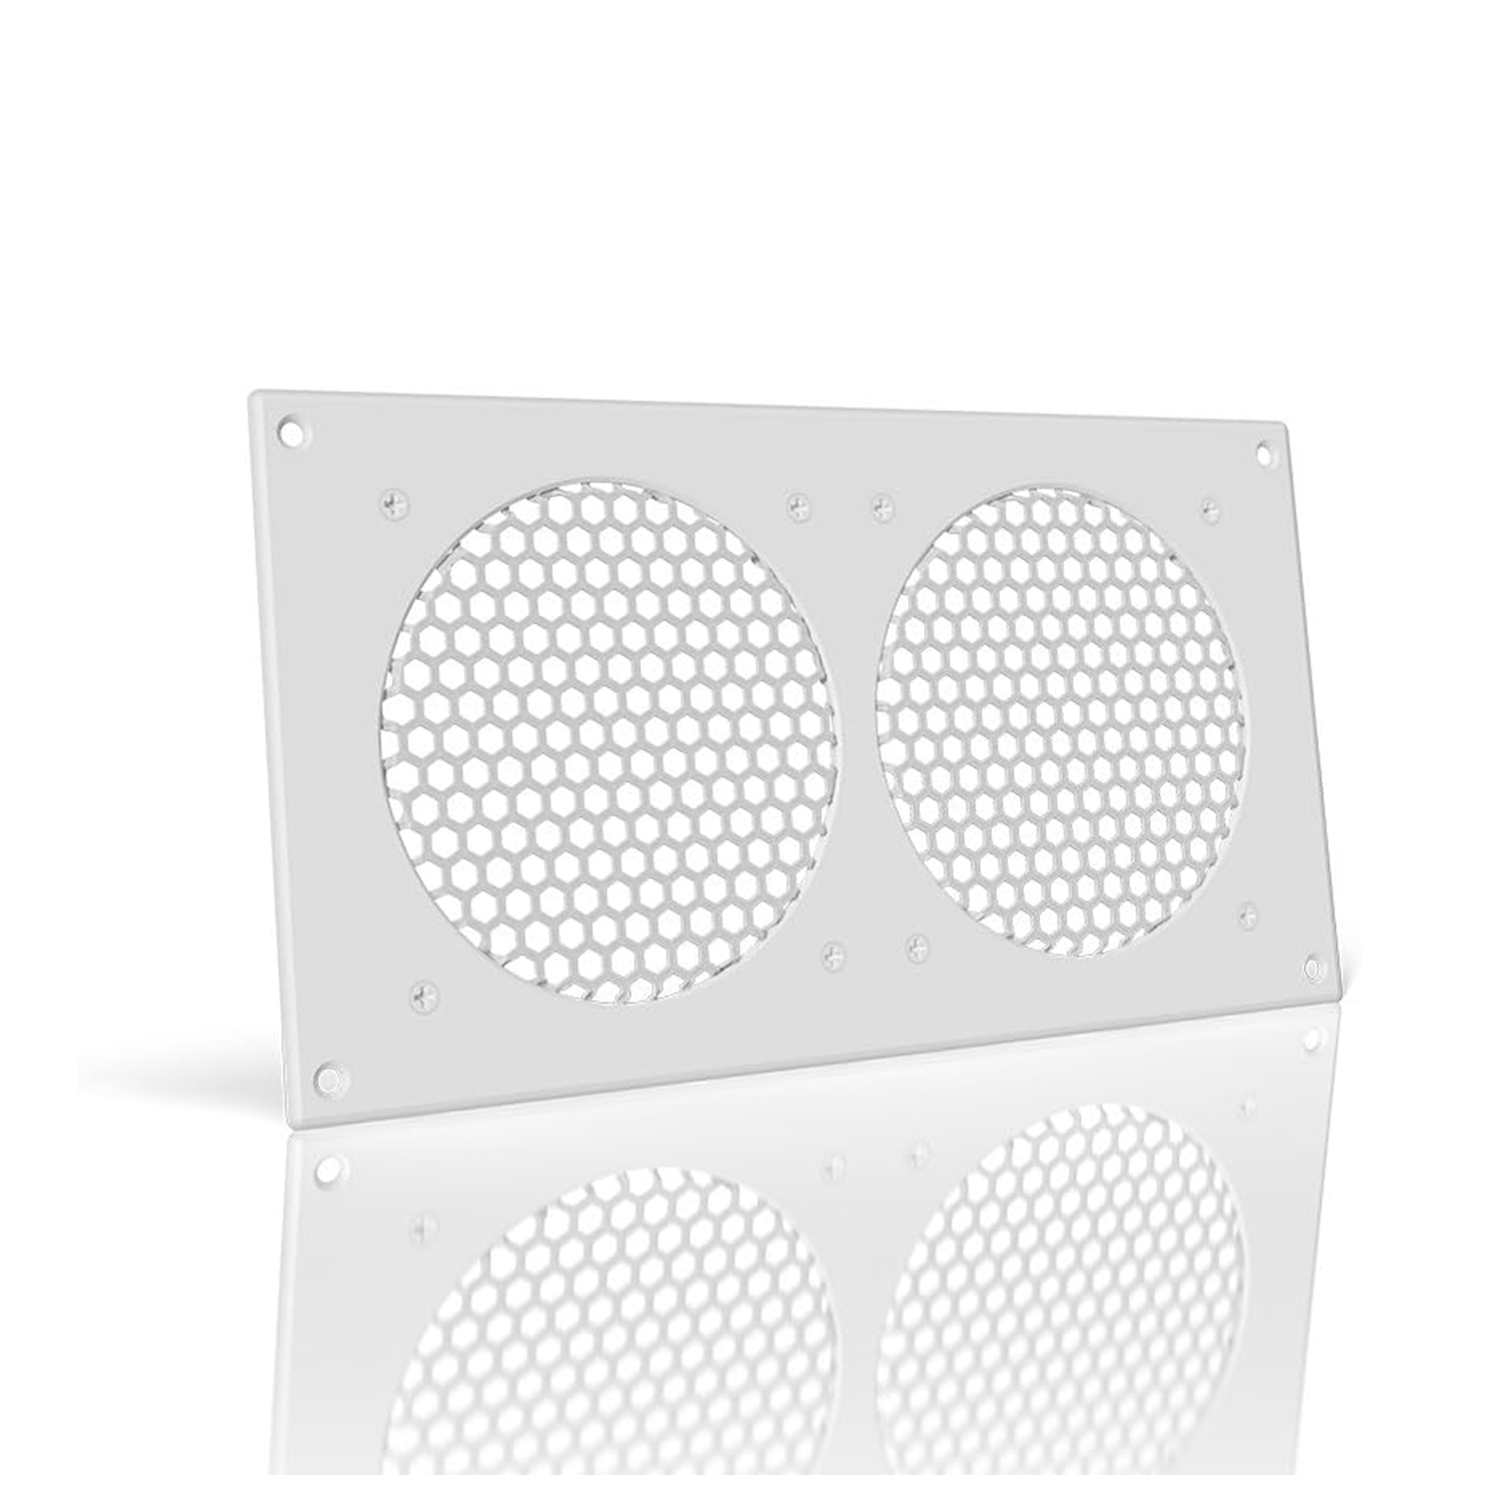
Before we secured them to the wall, we routed out holes for the PVC pipes, the electrical boxes, and some openings in the side for my cabinet fans to go. I planned to install this Infinity AC fan system with one set of fans on each shelf to make sure my computer and hard drives stay cool.

Then it was time to add the shiplap. We had done shiplap before around our fireplace, but decided to run it vertically here in this space. We learned that vertical shiplap is harder than horizontal! It didn't matter how many times we measured and planned it out, it still ended up a smidge off center. If you look closely, the last board on the right is thinner than the first board on the left. I think it’s because the spacing between each board was slightly different.

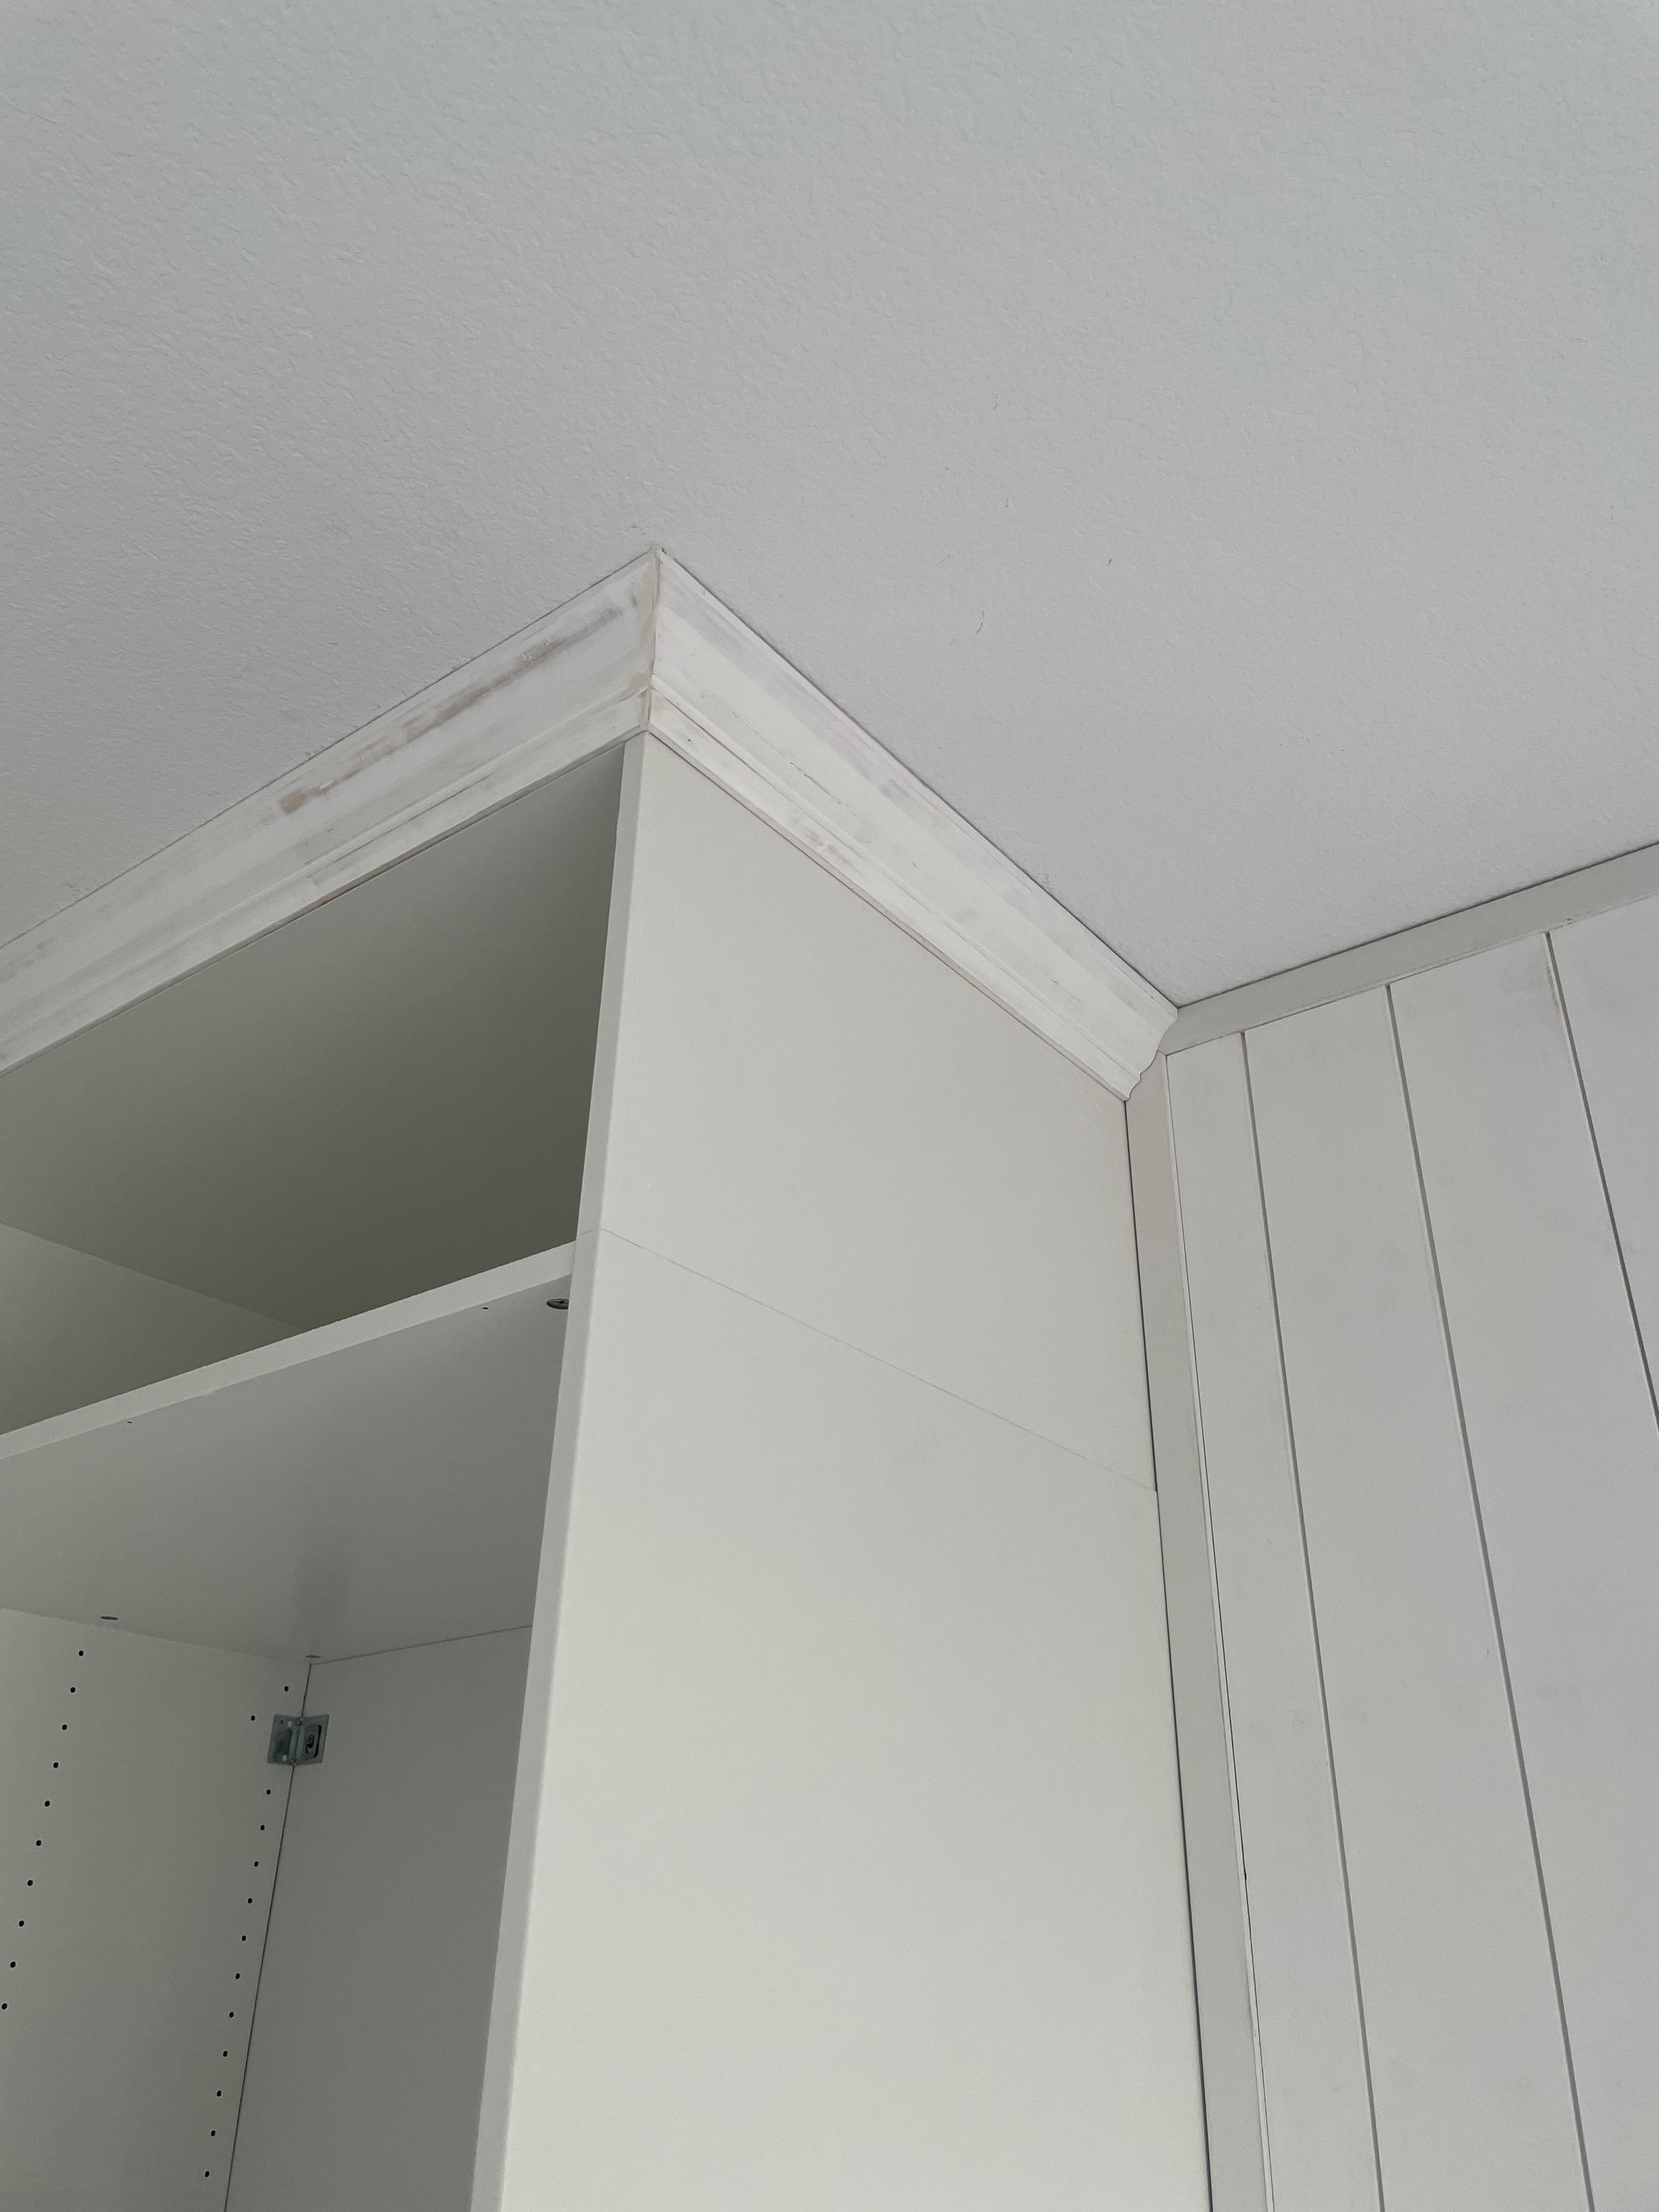


All that was left was to finish the trim, baseboards, and crown moulding around the cabinets, then caulk and paint. We added the rest of the cabinet doors, put together all of the cabinet inserts, and then it was time to move in!


We fit an 8x10 rug in the center of the room. And in the free corner, we put a soft seat and side table desk for the days when Brad works from home at the same time as me.
This was by far our biggest project to date, and I’m so happy with how it turned out! I work every day out of this office, and it’s so nice to have a space that’s organized, aesthetically pleasing, and so functional for the work that I do.
Product Links
As an Amazon Associate I earn from qualifying purchases.